AN EASY WAY TO MAKE CUSTOM FACEPLATES
[HOME] [PROJECTS] [CONTACTS] [DOWNLOADS] [PICTURES]
When I started building my first electronic circuits
(sometime back in 1986),there were not so many solutions for a nice looking
faceplate.
For my first enclosures I used the "rub on"
letters,right on the metal,that was later protected with transparent adhesive
film.
Today,with the pc,we can get excellent results in a
very short time.
With a simple images processing software,or even with MS
Word,anyone can easily design any type of faceplate,no matter if it is only for
a knob and a switch,or 20 knobs .
This is the method I use:
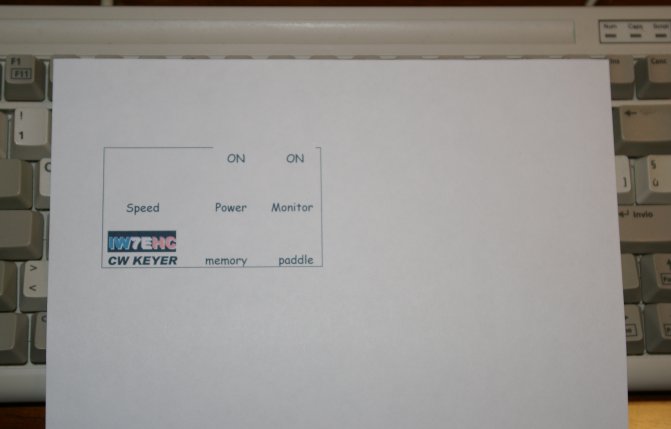
Once the layout of the faceplate is chosen,you can
start drawing ( in real scale) the faceplate,with the descriptions for each
control,using the software you feel most confident with.
I prefer MS Word,but any images processing software will
work.
(TIP:stick to the software you know better,If you do
so you will get better results)
Once the design is complete,print it (you can use
common white paper,or,if you like a different color as background,feel free to
choose any type of paper you want)
Try to fit as many images of the same faceplate as you
can on a single sheet.
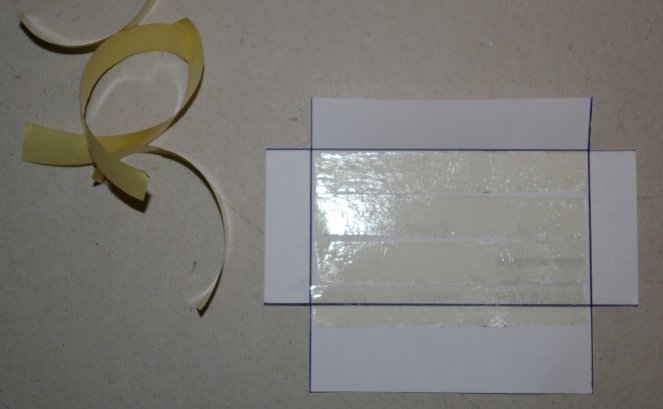
Cut around the image,leaving some extra paper all
around it,15 mm at least.
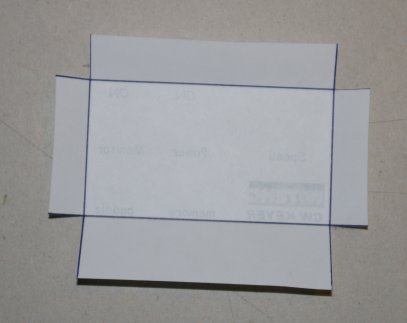
Fold it around the lines.A quick way to do it: use a
ruler and a ballpoint pen.
Mark the lines with the pen,this will leave a groove
on the paper that will make the folding easier.
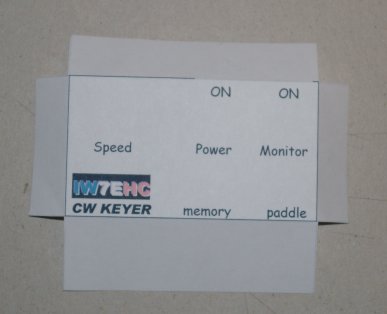
The extra paper will be used to center the sheet on the enclosure.
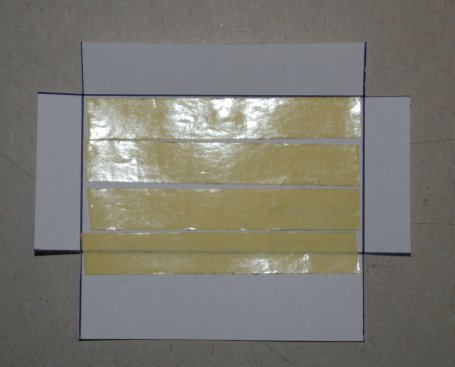
Get some bi-adhesive tape,and place it on the back
side of the sheet.
Make sure the tape is placed evenly all over the
sheet.
Make sure that the metal faceplate has been
drilled,reamed,and cleaned from grease.
The metal surface must be flat and clean.
Place the sheet on the table,with the printed side facing
down.
Carefully place the metal faceplate on it,until a full
contact is achieved
(TIP: it's easier to start from one corner,and then
move to one of the sides)
Make sure that there are no air bubbles trapped
beneath the paper.
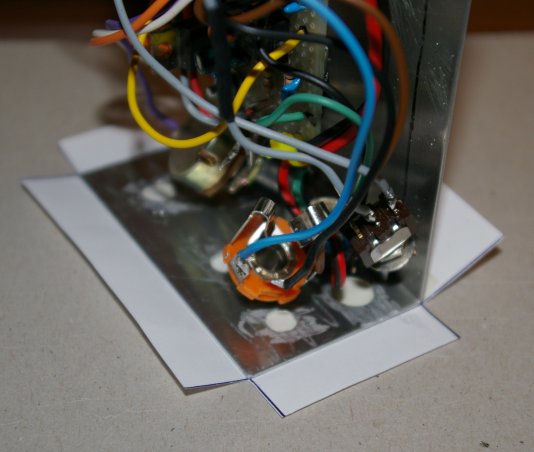
Remove the edges of the sheet,cutting them with a sharp knife..
Cut a piece of adhesive transparent film,same dimensions as the paper sheet
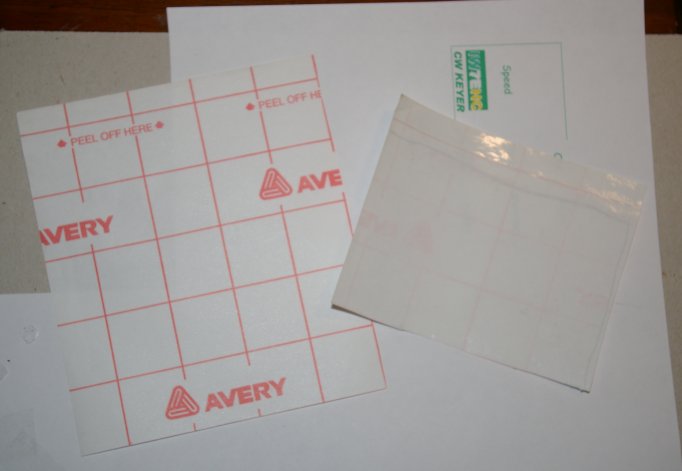
Remove the protective paper from the film,and place it
on the table with the sticky side up.
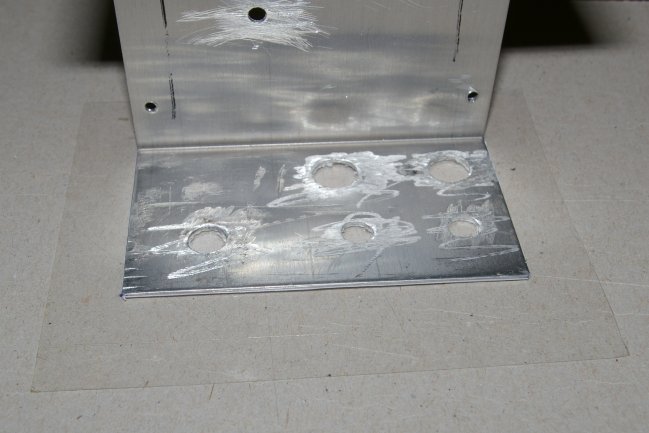
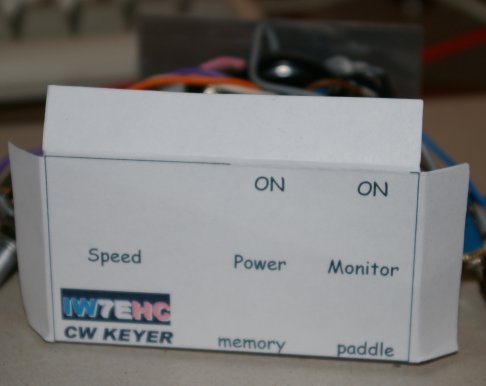
Fold the extra film around the edges of the faceplate.
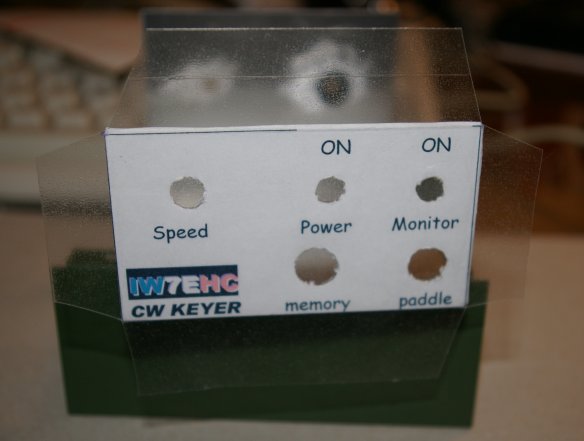
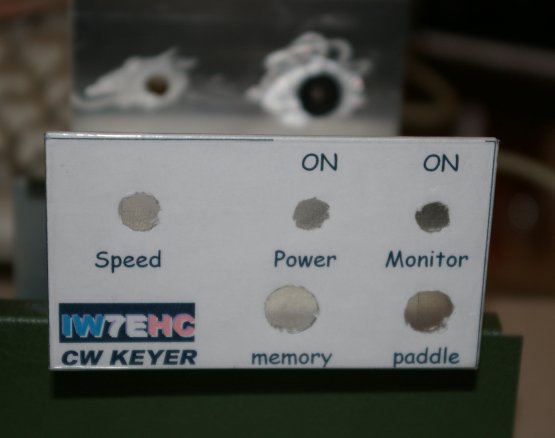
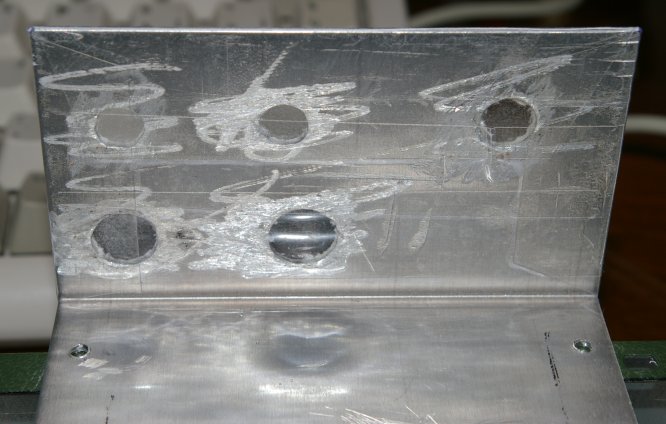
Grab an X-ACTO knife and cut the paper where the holes
for the switches and knobs are.
In case of large openings,itĺs easier to make an X
cut,and then fold the four section.
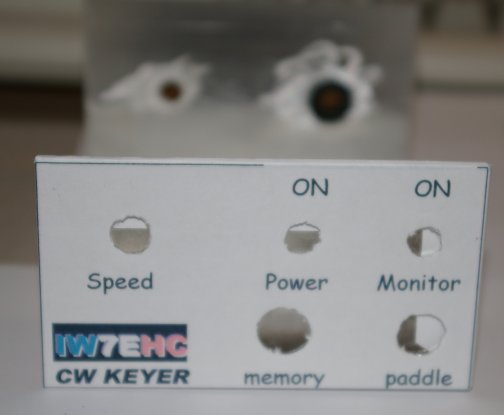
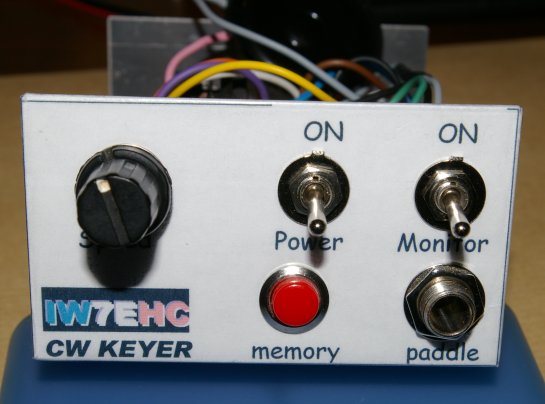
And this is the final result,,nice'n'easy,isn't it?
[HOME] [PROJECTS] [CONTACTS] [DOWNLOADS] [PICTURES]
![]()
Copyright 2007 by IW7EHC all rights reserved
